Around November 6th I received my new extruder. I really wish I had ordered earlier as I ended up having to wait quite a while since I was so far back in line. It’s amazing how much smaller the thing is than my old MK6.
I’ve had some adventures with it. I didn’t like the gear it came with, it required way too much tension for my taste. I switched it to a Makerbot MK7 gear and the extruder is doing a great job. The extruder block and metal adjustment screw that QU-BD uses for tension work very well. All the parts shown in this post were printed with it. By the way, when installing something new, don’t forget the mods you’ve already done. I accidentally screwed through the lighting I had installed while putting the new extruder in. Oops.
I wanted to use a bearing based extruder drive again, so as one of my final prints I made Jag’s extruder drive (see No Bots Left Working). It was very easy to install, but I ended up with the oddest problem. In the middle of a larger print (the X carriage shown above) the printer jammed. When I opened up the extruder I found that it was clogged with plastic shavings. It seems that the bearing was positioned slightly below the drive gear, causing the filament to push against the side of the feed tube.
So I switched back to QU-BD’s parts and was able to print no problem. I’ve made whosawhatsis’s Minimalistic MK7 Replacement and ran some plastic through it, but I haven’t used it for a real print yet. I’m a little worried about the amount of tension that the spring holds, but it did work great for the quick test I gave it.
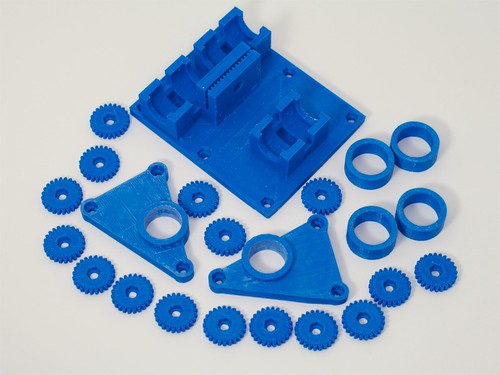
But the bigger deal is now that my printer is running again, I can finally do a bunch of upgrades I’ve had planned. I bought a bunch of LMB6UU linear bearings which form the core of the upgrades I performed. My hope was that this would allow me to speed my bot up and quiet it down a bit.
First I replaced the bearings on the Z axis using dnewman’s spacers. I have pictures of that process and the rest of my mods in my Flickr stream, which I should make a post on later. Next I put a pair of linear bearings on the Y axis with Jag’s Y Axis Bearing Holder/Spacer. To finish the bearing replacements I printed out MakeALot’s Linear Bearing X Axis Carriage for ToM and installed it. Like some of the others in the comments on the Thingiverse page, the parts that are designed to hold the bearings in place snapped on me, but I was planning on using the zip ties anyway.
With those mods installed, it is much easier to push the axis around, but things are not quieter. For some reason the Y axis seems to make even more noise than it used to, but the vibration goes away if I put just a bit of weight on the right side (such as resting a finger on it). I haven’t had a chance to look into that yet, but I’m hoping I can fix it. My apartment isn’t very big so I can’t put the printer a couple of rooms away where the noise won’t bother me; I also worry about the noise annoying my neighbors.
As long as I had everything apart, I decided to install famulus’s HBP Quick Leveler Redux. My old solution basically worked the same way, except there were no finger nuts so things had to be adjusted with needle nose pliers, which was very difficult. The new levelers were very easy to adjust, but I’m not sure they’ll stay installed. On the Thingiverse page people only seem to add levelers to the four corners, but I’m crazy and added them to all 8 outer points. That alone is odd because I added 2 additional bolts to make it easier to level the bed completely. Well I had to remove the two thumbwheels off the right side of the bed since they interfered with the X limit switch. The thumbwheels on the front corners mean that the bot can’t access the entire build surface; when trying to use the back corners the thumbwheels on the front can hit the sides of the front panel. Leveling my bed before was a big process, but it only had to be done once or twice (tip: thread-lock means the adjustments won’t shake loose).
It’s nice to be up and running again. The MK7/8 style extruder is very nice, and heats up even faster than my old MK6+. In fact, it makes it much more obvious just how slow the HBP is to heat up. I want to try whosawhatsis’s tensioner for a while, and I need to get things perfectly calibrated (I did a quick adjust on the great profile created by Makerblock’s Profile Maker). Then comes the real fun of upgrading to Sailfish and SF50 and seeing just how fast my printer can go. Plus, I have a roll of PLA I’m itching to try out. I really want to get back to printing out little objects so I can paint them and just add new toys to my desk.
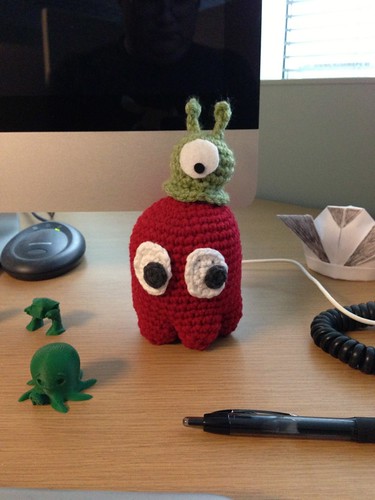
To close this post, I’ll put up a picture of my latest Crochet creation. One day in late October I decided to make a second mini-Brain Slug, and it only took me about an hour and a half. Now we’s sitting on my desk, keeping Blinky in line.