I’ve officially given up on linear bearings. Two weeks ago I installed the linear bearings in my MakerBot, but didn’t like the initial noise results. Today I finished removing them and putting the old copper bushings back.
The linear bearings were amazingly smooth. If you put on one a rod and started tilting it, it would roll off the rod very quickly. There was almost no friction. In contrast, the copper bushings hold on for at least 5 to 10 degrees more before they start to move, and they have enough drag that they don’t pick up nearly as much speed.
But the noise drove me nuts. When I asked about noise solutions on the MakerBot google group they gave me some ideas, but I just couldn’t solve it. I got some white lithium grease, but putting that in the bearings made almost no difference (works nice on the bushings though). Everyone recommended PTFE based grease but I couldn’t find it locally and didn’t care enough to order it and wait.
If I owned a house where I could put the Thing-o-Matic a few rooms away, I would probably leave the linear bearings in. But in my one room apartment, I have to live right next to the noise and it was far too loud.
As long as my bot is open, I’ve been doing a few other upgrades. I installed M_G’s tensioning pieces, which worked great. When I reassembled my X axis is was pretty cool to be able to turn one bolt and have the slack in the belt pulled up. It’s so much easier than loosening four bolts, pulling the motor, and trying to hold that while tightening things back up.
I added Campbell’s Y-axis idler and I plan to install Joakim’s X follower. I made both when I first got my printer, but things weren’t calibrated well enough at that point so neither fit (nor worked) very well. Now that I know what I’m doing I know I can do much better. The Y idler should help with the tension (and hopefully reduce noise), while the X follower should make the X axis much smoother since it cuts the number of bushings in half. I also saw a reference to epideth’s Z axis bearings which I’d also like to. I don’t like how close the bushings on the Z axis are, the make it possible for the whole thing to wobble because it can’t support it’s own weight very well. Once the weight of the giant MK6 motor was gone, I was amazed how far the end of the Z platform could bounce if I pushed it with my finger. Having those long supports should help.
Last I finally got around to installing static drain lines which I’ve been meaning to do for over a year. When the air gets dry this time of year I start to get zapped by everything in my apartment, so I get really worried that I’m going to damage my MakerBot. I also used up a ton of 1/4″ kapton tape (mine came from MakerBot) to tie up some of the loose wires in the base, which really cleaned things up. I don’t know why I didn’t think of it before. I cut pieces just a few inches long and wrapped them around the groups of wires every few inches.
After that I’d just like to get back to printing little things and painting them. That was quite a but of fun but I haven’t been able to try it in a long time. After all my tinkering it’s clear I’m pushing the Thing-o-Matic a bit, I’m wondering when I should give up and decide to buy a new printer. I’m not sure which model I’d want though. Make’s 3D printer guide was a fun read, but didn’t give me a clear winner.
Ultimakers have always looked nice, and I like that they’ve moved to cartridge heaters, but the lack of a heated bed means printing ABS parts would have to be small. I also really like Sailfish and have no experience with the Marlin firmware.
The Replicator 2 looks nice, and I’ve had great experiences with Makerbot. But I’m not sure about Makerware and would be happy to get away from Skeinforge. I hear so many great things about Slic3r, I think I’d be happy to move to it. While the Replicator 2 is much closer to an appliance (which is a good thing at this point), it doesn’t do ABS (the Replicator 2X will). The biggest con is that those printers are very expensive.
All of this is rather academic, as I’m not that interested in spending the money right now. But I keep thinking about it.

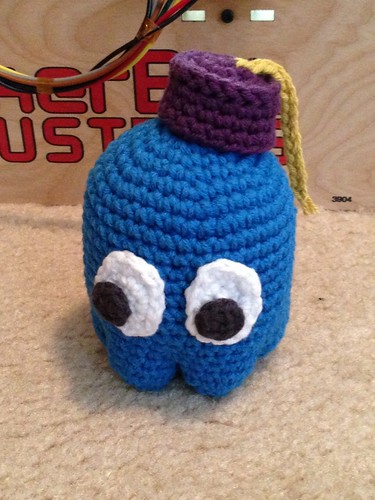 Ladies and gentleman, the first piece of crochet I designed myself!