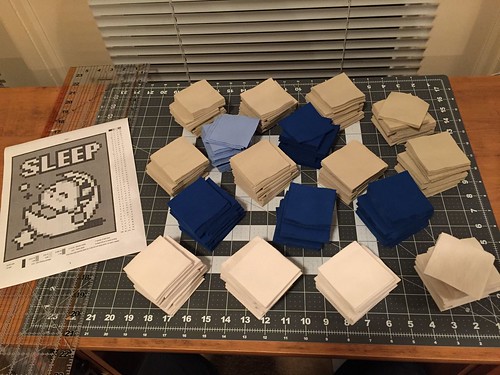
So after spending a month making stuffed animals I got it in my head to try making a pieced quilt of Kirby. Above you can see a picture of all the squares I’ve cut and the pattern I’m making. I’ve never made a quilt before, but that didn’t stop me with the stuffed animals so after some research I dove in.
It started when I was almost done with Ilo and Milo. I started looking for my next project and didn’t have a good pattern for my next stuffed animal. After piecing squares together to make Ilo and Milo making a quilt seemed like a good next step. I’d seen pieced video game quilts before (an example how-to) and it seemed achievable.
![]() I spent some time looking at NES/SNES pixel art to try to find a good subject. I considered Mario (especially the boot from Mario 3), Lolo and Lala, Kirby, Mega Man, Bomberman, and a few other things. But while I was looking around I found the sprite for Kirby’s sleep power and decided that would be good. While looking for a good copy of the sprite I found a Sleeping Kirby Quilt by 8bitHealey on Etsy and fell in love. I kept searching and came across the Kirby Sleep Pixel Painting by RubiksPhoenix on DeviantArt, and decided to use his color scheme.
I spent some time looking at NES/SNES pixel art to try to find a good subject. I considered Mario (especially the boot from Mario 3), Lolo and Lala, Kirby, Mega Man, Bomberman, and a few other things. But while I was looking around I found the sprite for Kirby’s sleep power and decided that would be good. While looking for a good copy of the sprite I found a Sleeping Kirby Quilt by 8bitHealey on Etsy and fell in love. I kept searching and came across the Kirby Sleep Pixel Painting by RubiksPhoenix on DeviantArt, and decided to use his color scheme.
 I made a spreadsheet using Numbers to figure out what it would look like and how much fabric I would need. I determined that I could make a 70″x90″ quilt easily using 2″ squares (35×43) and I figured I’d like that size. I spent $55 buying the fabric and when I got home I put it in my washing machine to pre-shrink it.
That’s when I learned Accidental quilting lesson #1: you need to baste fabric or use pinking shears before washing or you’ll get a huge knot when the fabric unravels.
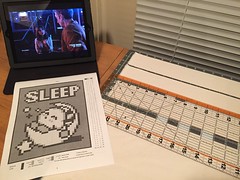
After fixing and drying the fabric I ironed all of it flat and started cutting squares. Between listening to Accidental Tech Podcast and watching Dr. Who the ironing and initial cutting went quite well. I spent a little under 3 hours total ironing and cutting and ended up with 214 little squares.
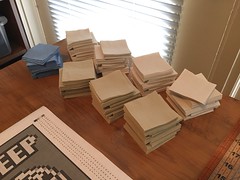 The next day I spent another hour cutting fabric while listening to Isometric and ended up with a total of 787 squares of fabric, which is about half of what I need.
After a day off I decided to really fly and try to finish all my cutting. It turned out my initial estimates of how much fabric I needed were off because I ran out of the tan background color after 30m. At least I was getting faster because I was up to 1,203 squares (yes, I’m keeping track of all this). This time I was listening to Snap Judgement. I went back to the store to get one more yard of tan for $5. Since I had learned my lesson I using my pinking shears on the fabric and threw it in the wash.
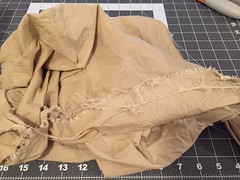 Accidental quilting lesson #2: pinking shears aren’t good enough. Turns out you have to baste the fabric because my washing machine is strong enough to pull the little threads out and make a knot anyway.
Fixed that, dried, ironed. Finished all my cutting after 40 minutes so now I’m up to 1,651 squares and can start sewing. I’ve still got fabric left to make bias tape but it may not be enough. I’ve decided to leave that until I’ve got the front sewed together. I also haven’t picked a color the back, I figure that can wait until I’ve got more of the front done.